• When you click on links to various merchants on this site and make a purchase, this can result in this site earning a commission. Affiliate programs and affiliations include, but are not limited to, the eBay Partner Network.

Improving the "weathering / ageing" process...

ties70

Well-Known Member
Hi,

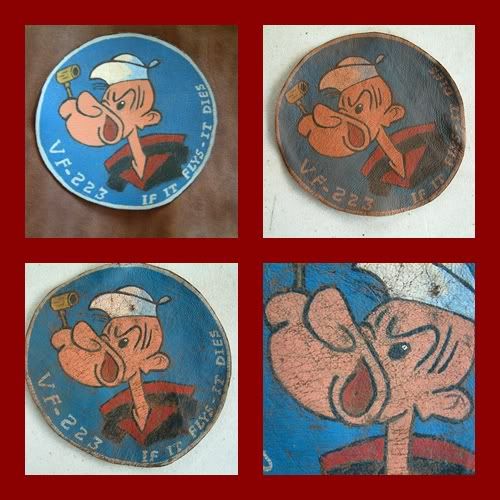
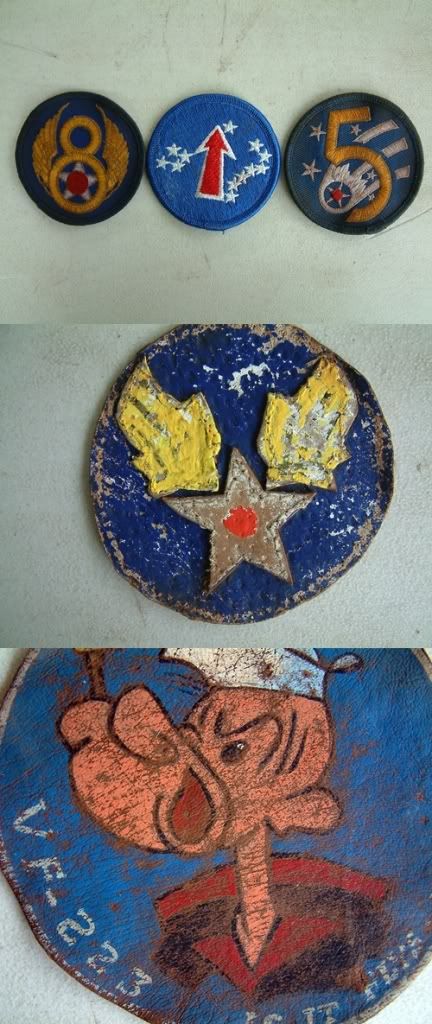
while I was (and still am) pretty happy with my basic painting skills, my last patches were too "new" looking....couldn't somehow figure out a weathering process.

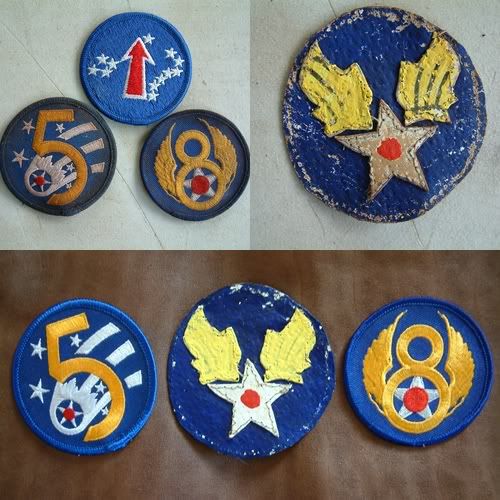
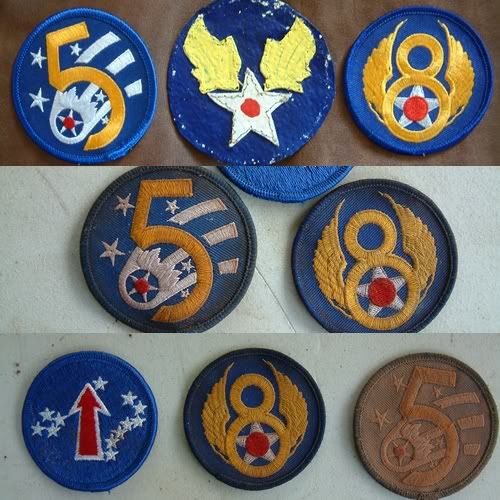
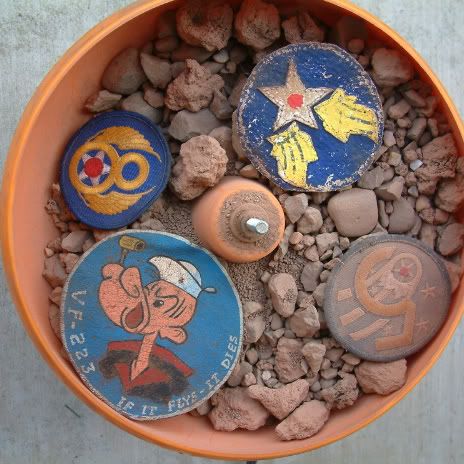
So I tried something new....here is the result:

444BS_comparison.jpg


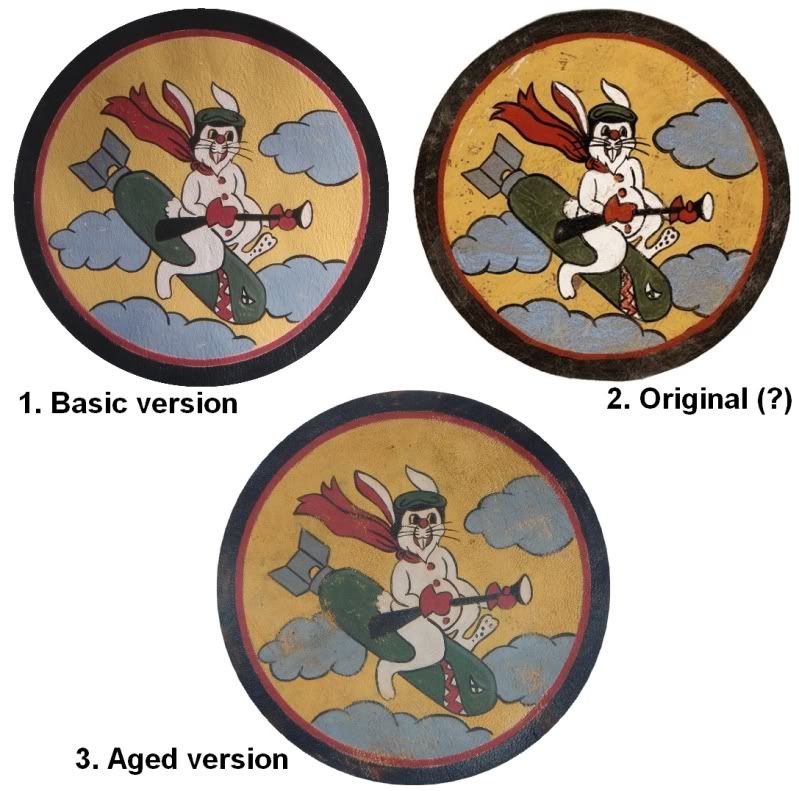
I am not sure if the "original" actually IS original, though.

Maybe I will repaint the black outlines, and do some "drybrushing" (Military modellers will know what it is....).

Ties
 

rich

New Member
I think that looks great. (I've had a repro patch lying in the back garden for nearly two years now, the ******* thing still looks as new as the day I bought it )
 

Andrew

Well-Known Member
rich said:
I think that looks great. (I've had a repro patch lying in the back garden for nearly two years now, the ******* thing still looks as new as the day I bought it )
I've tossed that idea around in my mind too Rich as the tough climate here should speed the process up, but i'm scared of messing up Ties beautiful work...
 

Persimmon

Well-Known Member
Can I ask what your latest ageing technique is ?
The latest one certainly looks as if its been in a war or two
Alan
 

ties70

Well-Known Member
Persimmon said:
Can I ask what your latest ageing technique is ?
The latest one certainly looks as if its been in a war or two
Alan

It is basically stuff from my scale modelling experiences: Scraping off paint, different washings of diluted acetone and paint....

Ties
 

442RCT

New Member
I have some patches I'm going to try to age. I plan on putting them in a rock/brass polisher/tumbler with low grit media that's been used to polish dirty brass (after removing the brass). I'll take them out periodically to see how the weathering goes and stop when it acquires a worn dirty 'patina'. I don't know how it'll actually work, I may just end up grinding all the paint off the leather.
 

better duck

Well-Known Member
Ties,
I think the basic effect looks good, except for the hazy look of the treated repro, as opposed to the clarity of the colours of the "original". Or is it just the effect of a flash? If not, the grey haze spoils the patch a bit, IMHO.
 

ties70

Well-Known Member
Peter,

partly it is the flash, but you are right also:
The washing left a hazy appearance, which I plan to get rid off with aceton, and after that a try of dry brushing the design with the base colors. This should give some highlights to the design (especially the rabbit) and enhance the colors without looking to new and artificial.

Ties
 

rich

New Member
The colours would desaturate with age though wouldn't they .......... UV and all that kind of stuff?
 

dujardin

Well-Known Member
try what i call the ''juice''

it's a mix of zippo lighter fluid (zlf) and oil paint ''burnt sierra''.
mix it till the paint is completely disolved into the zlf and than apply on or entire or part of the patch.
the mix will go in every holes and than the zlf with evaporate quickly
only the ''paint'' will remain
just make a try on a test piece and you will see the result.
and if you want to correct, just use zlf with a clean brush to wash the patch

it require some test practice but when you got it, it make miracles

at least in painting scale model, so using oil paint for vehicle or plane, and also using oil paint (+zlf) for ''weathering''; i think it could be used succesfully with patch aging process

hope my (poor) translation could help

you can found this procedure explained by françois Verlinden his his book

byeeeeeeeeeeee marcel
 

ties70

Well-Known Member
better duck said:
Ties,
I think the basic effect looks good, except for the hazy look of the treated repro, as opposed to the clarity of the colours of the "original". Or is it just the effect of a flash? If not, the grey haze spoils the patch a bit, IMHO.

Hello Peter,

here is the patch after the dry brushing procedure. It is hard to get a good picture, though:

444BS_aged_final.jpg


I have worked on some parts of the black outlines, dry brushed the black outside circle, and enhanced the rabbit's white color.

The result is definitely closer to the brilliance of the "original" (still not sure if it really is an orifginal or not). Maybe, if I use less paint for the "burnt umber dark wash", the results will be even better...

Ties
 

jack31916

Well-Known Member
Hi Ties,

A well done and authentic looking patch! To give it a more glossy look you can add some leather treatment to the patch. The matt colors will get more "deeper" and will match better to your original (?).


Regards,

Jack
 

442RCT

New Member
dujardin said:
try what i call the ''juice''

it's a mix of zippo lighter fluid (zlf) and oil paint ''burnt sierra''.
mix it till the paint is completely disolved into the zlf and than apply on or entire or part of the patch.
the mix will go in every holes and than the zlf with evaporate quickly
only the ''paint'' will remain
just make a try on a test piece and you will see the result.
and if you want to correct, just use zlf with a clean brush to wash the patch

byeeeeeeeeeeee marcel

Marcel, does it matter what kind of paint (enamel, oil or latex) zlf is used on. If zlf is mixed with an oil paint, does that mean the patch was painted with oil paint ?

I guess I should just paint one of my latex painted patches with zlf to see if the paint bubbles off.

I was at an airshow one year and had sunblock lotion on my forearm and wrist, it was too hot to wear my jacket so I had it draped over my arm. That sunblock on my arm started to dissolve the latex paint job on my jacket. :eek:
 

dujardin

Well-Known Member
helloooooooooooo

yes, oil paints

such as Winsor&Newton or Sennelier or any other manufacturer
 

ties70

Well-Known Member
jack31916 said:
Hi Ties,

A well done and authentic looking patch! To give it a more glossy look you can add some leather treatment to the patch. The matt colors will get more "deeper" and will match better to your original (?).


Regards,

Jack

Thanks Jack,

you were right: I have applied a thin coating with Tandy's Leather Satin Sheen Varnish...good result!

Ties
 

442RCT

New Member
442RCT said:
I have some patches I'm going to try to age. I plan on putting them in a rock/brass polisher/tumbler with low grit media that's been used to polish dirty brass (after removing the brass). I'll take them out periodically to see how the weathering goes and stop when it acquires a worn dirty 'patina'. I don't know how it'll actually work, I may just end up grinding all the paint off the leather.

Okay, here are some of my results from this experiment.
I took a couple of 'cheap' embroidered reproduction AF patches, the kind with a plastic backing, (frankly I didn't want to use any of my originals) - bad mistake. These patches are 'bullet proof'. After 16 hours in the vibrating rock polisher with polishing media and a couple of big rocks, they were discolored from the reddish polishing media, that's about it.

I took one of my acylic painted patches and after 16 hours in the rock polisher, same thing, no real damage to the patch, just the reddish polishing media being ground into the patch.

Composite_01.jpg


I'd taken the patches out every 8 hours and used a toothbrush and dish soap to scrub them under hot running water. If anyone ever had doubts about acrylic paint not holding up on a leather jacket, I can tell you if the leather was properly prepped...it will hold up. That patch was soaked and briskly scrubbed with a toothbrush twice, then left to dry.

Since it didn't seem to be doing much 'aging', I decided to substitute the polishing media with assorted gravel mixed with lava rock. I figured the gravel would have more of an abrasive effect on the surface of the patches. I timed it for three hours instead of 8. I took the patches out, scrubbed them again and found the rocks finally gave the acrylic painted patch a nice worn 'patina' look. The cheap embroidered repo patches...no change.
composite_04.jpg


The top row is the after 16 hours and scrubbed, one new patch for comparison.
The bottom are the patches at the start of the aging experiment. The AAF Headqurters patch is a cheap Mexican made pieced patch. I don't know what type of paint was used to paint it, it appears to be enamel.
Composite_02.jpg


Top row - Beginning of experiment
Middle row - After 16 hours in polishing media and scrubbing with toothbrush and dish soap.
Bottom row - 3 hrs additional with gravel.
New patch for comparison - 8th AF Patch - 5th AF patch before scrubbing with soap and toothbrush.
Composite_03.jpg


I'll continue the experiment with the gravel treatment and add more pics as it progresses.
DSCF0015-1-1.jpg
 

better duck

Well-Known Member
I can see there is some serious science involved by now in the quest for the Perfect Patch, even involving control groups to validate the research!!! :D
Great stuff man, really!
 

442RCT

New Member
better duck said:
I can see there is some serious science involved by now in the quest for the Perfect Patch, even involving control groups to validate the research!!! :D
Great stuff man, really!

It'd only be the Perfect Patch if you had the perfectly weathered jacket that you wanted to sew it on. :lol:
 

442RCT

New Member
This is the end of this patch distressing/weathering experiment. Since the gravel was so abrasive, I only used the vibrating rock polisher for one more hour. I scrubbed the patches under running hot water with a toothbrush. The embroidered patches did 'look' better to me with that ground in 50 mission grime and the brightness worn off. The AAF headquarters patch had major paint flaking, it now looks like it's 60 years old. The latex painted Popeye patch, I think looks pretty good, it's now got character and patina, although I wouldn't have done the last hour of the test with the VF-223 patch and would have left it at the previous stage if I was going to sew it on a well worn G-1. I'm going to take some of my other patches and try it with the gravel-lava rock mix and see what that produces. :roll:

One thing I've mentioned already is my amazement on how the acrylic painted images on leather held up to the abuse; 12 hours in vibrating rock polishing media, 3 hours in a gravel-lava rock mixture and the running hot water, dish soap scrubbing with a toothbrush three times.
composite_05.jpg

ps - The VF-223 Popeye patch doesn't really exist, it was something I made up when I was learning how to paint.
 
Top